

Hardware-software integration rarely fails because the problem is genuinely hard. It fails because the standard debug workflow — check the datasheet, tweak the driver, add more print statements — gives you no direct visibility into what's happening at the bus level. You're inferring behaviour from symptoms rather than observing it. This post covers the specific failure modes that cause integration problems, and the diagnostic approach that resolves them in hours rather than days.
The Root Causes
Protocol configuration mismatches
SPI has four clock polarity/phase combinations (CPOL/CPHA modes 0–3). A peripheral configured for mode 0 connected to a driver running mode 3 will appear completely unresponsive — no error code, no NAK, just silence on the bus. Without bus-level visibility, this is indistinguishable from a hardware failure.
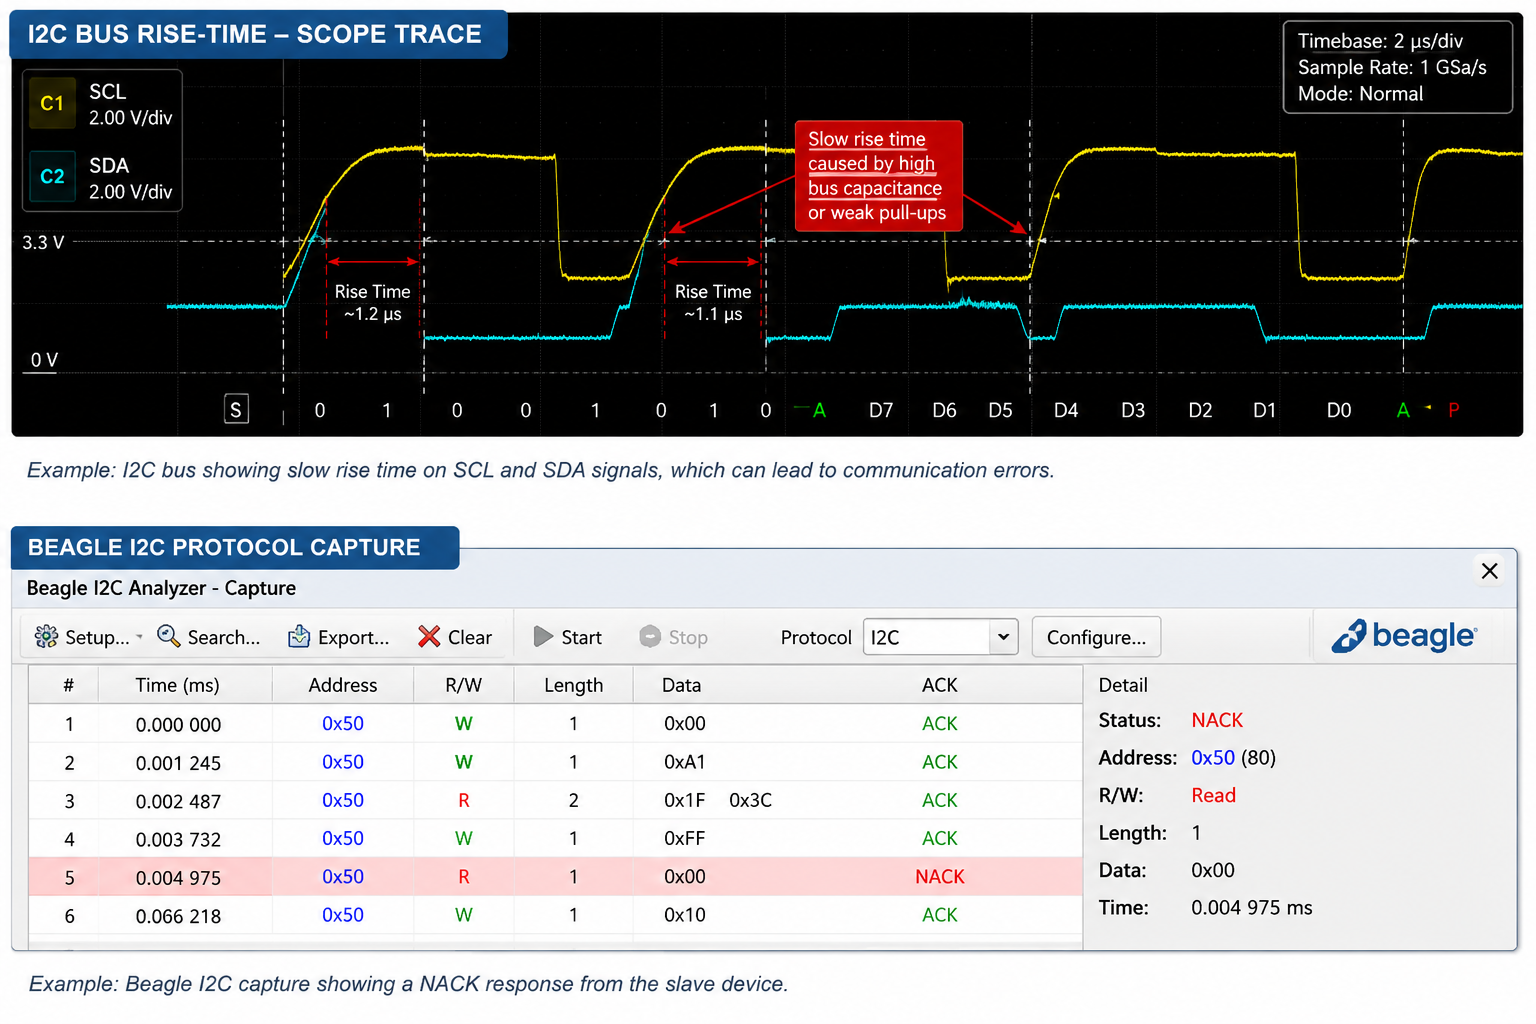
I2C has similar traps. A bus with 400pF total capacitance and 10kΩ pull-ups will take over 4μs to pull high — well outside the fast-mode timing budget. The result is intermittent ACK failures at 400kHz that don't appear at 100kHz and are nearly impossible to diagnose without a protocol analyser.
Clock-stretching is another common culprit. Some MCU I2C peripherals — particularly certain STM32 HAL implementations — have incomplete clock-stretching support. A peripheral that legitimately stretches SCL during conversion will appear to hang the bus entirely.
Hardware and firmware developed out of sync
PCB design and firmware development run on separate timelines. Pull-up values, address pin configurations, default register states — these are fixed in hardware before firmware has a chance to test them. The first real integration test happens late, when the cost of finding a problem is highest.
No clean separation between hardware and firmware faults
When a peripheral misbehaves, both the hardware and the driver are suspect. Without a way to interact with the peripheral independently of your MCU, fault isolation relies on guesswork. The symptom — device not responding, corrupted reads, unexpected resets — is the same whether the problem is a bad pull-up, a driver bug, or a race condition in interrupt handling.
The Right Tools
I2C/SPI host adapter: Total Phase Aardvark
.png)
The Aardvark gives you direct I2C master/slave access (up to 800kHz) and SPI master access (up to 8MHz) from a PC, with no target firmware involved. In practice:
- Scan the bus and confirm which devices ACK before writing any driver code
- Read device IDs and configuration registers directly
- Replay exact transaction sequences via Python script or the Control Center Serial GUI
- Use slave mode to emulate peripherals that haven't arrived yet, unblocking firmware development
If a device ACKs on the Aardvark but not through firmware, the bug is in the driver. If it fails on the Aardvark too, it's hardware or configuration. That distinction alone eliminates most of the guesswork.
Aardvark I2C/SPI Host Adapter — available from The Debug Store with worldwide shipping. View pricing and stock
Protocol analyser: Total Phase Beagle I2C/SPI
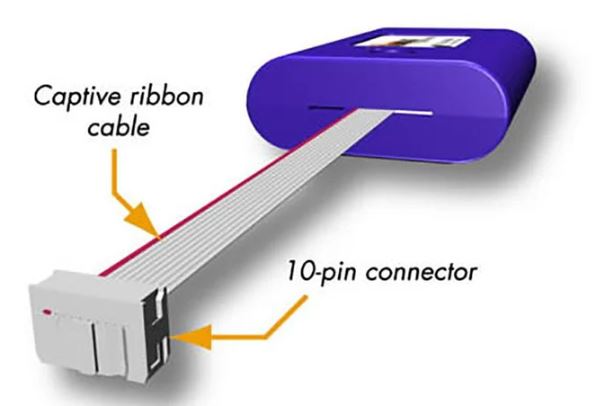
The Aardvark is active — it generates transactions. When you need to observe the actual traffic between your MCU and a peripheral without interfering, the Beagle sits passively on the bus, captures every transaction, and decodes it. Used together, you get both stimulus and observation — the combination you need when fault isolation requires watching what actually happens on the wire, not just what should happen.
High-speed SPI: Total Phase Cheetah
.png)
Where SPI throughput beyond the Aardvark's 8MHz ceiling is needed — programming large SPI NOR flash, characterising high-speed peripherals — the Cheetah handles up to 40MHz and runs the full erase/program/verify cycle via Flash Center. It removes the need to implement erase sequencing, page-aligned writes, and status polling yourself before your bootloader is ready.
I2C/SPI Activity Board
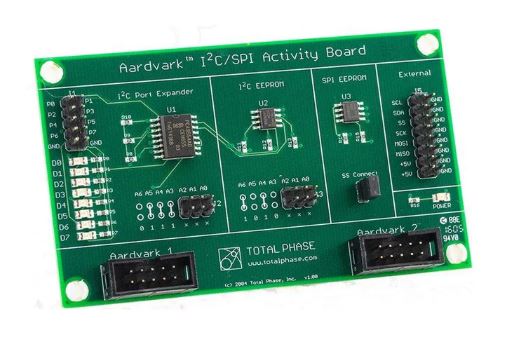
Onboard I2C EEPROM, SPI EEPROM, and LED indicators for quick visual confirmation of bus activity during bring-up. Useful as a known-good test target when you're characterising a new adapter setup or validating a script before connecting it to live hardware.
What to Do Differently
- Validate hardware before writing firmware. Confirm every I2C/SPI device ACKs through a host adapter first. A device that doesn't respond at this stage has a hardware or configuration problem — fix it before driver work starts.
- Isolate faults explicitly. When something breaks, the first question is: does it fail on the adapter too? One question, clear answer, no guessing.
- Script and version-control your test sequences. Control Center Serial XML batch scripts are small files that document exactly how your hardware is supposed to behave. Treat them as test fixtures alongside your schematic.
- Test at the edges of your spec. Sweep bit rates. Test at temperature. Add realistic bus capacitance. The problems that escape bench testing almost always appear at the limits of the operating envelope.
- Make integration decisions at schematic stage. Pull-up values, address pin strapping, power sequencing — these either prevent integration problems or cause them.
FAQ
We're getting intermittent ACK failures on a mixed I2C bus — where do we start?
Check bus capacitance and pull-up values first. Total capacitance above ~300pF with standard pull-ups will cause edge degradation at 400kHz that doesn't appear at 100kHz. Measure SCL/SDA rise time, or capture the bus with a Beagle to see exactly where ACKs are being dropped. If capacitance is within spec, check for a device that's clock-stretching — some MCU HALs don't handle it correctly and will appear to hang.
How do we tell whether a SPI peripheral failure is hardware or firmware?
Use the Aardvark or Cheetah to replay the transaction your driver sends. Start with a device ID register read — if that works, the physical connection, CPOL/CPHA mode, and chip-select polarity are all correct. If it fails, work through mode, speed, bit order, and voltage levels before assuming anything more serious.
Can we use the Aardvark to program SPI flash before our bootloader is ready?
Yes. The Aardvark with Flash Center handles full erase/program/verify cycles on SPI NOR flash. You can pre-load firmware images, calibration tables, or configuration data independently of any MCU firmware — one of the more practical early board bring-up workflows.
Get the Right Tools from The Debug Store
If you're working through an integration problem now, start with the Aardvark — it will tell you within minutes whether you have a hardware fault or a firmware bug. Order today from The Debug Store with worldwide shipping from £335.