


Mikroelektronika d.o.o.
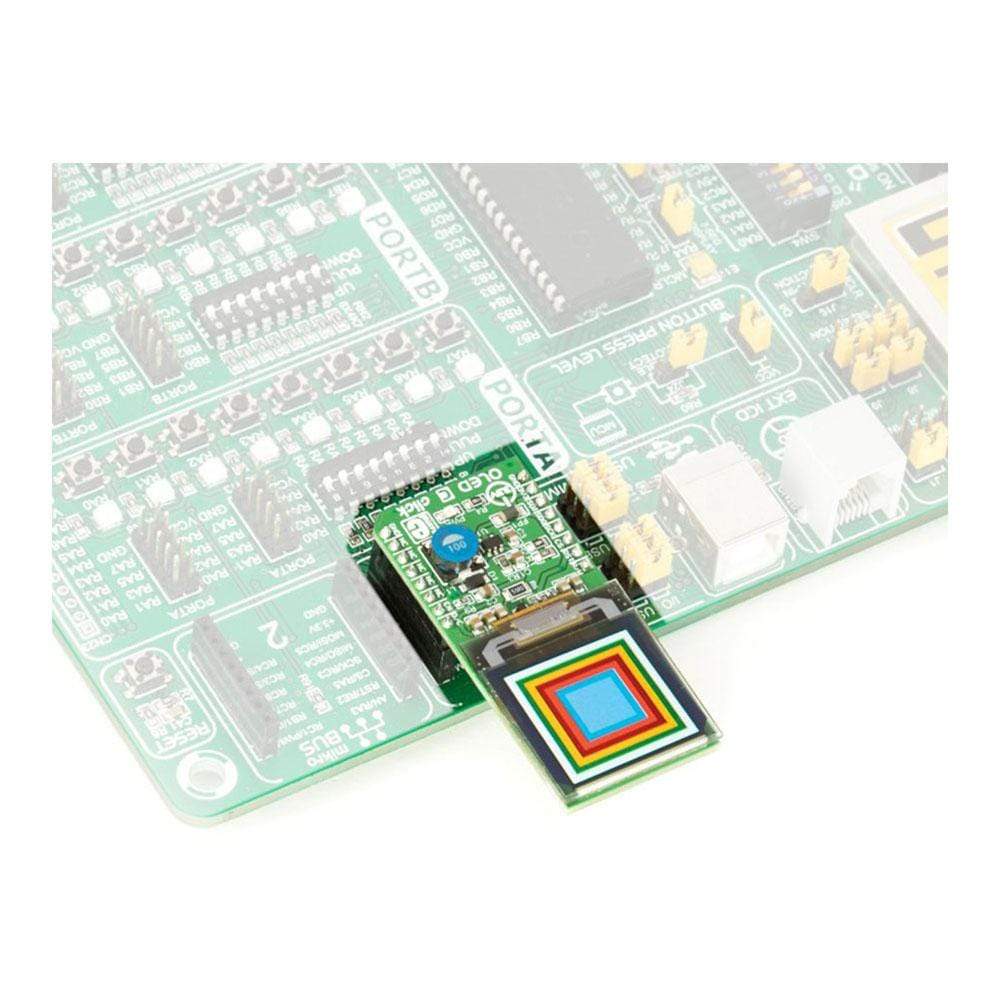
OLED C Click Board™
OLED C Click Board™
SKU: MIKROE-1585
Couldn't load pickup availability


Overview
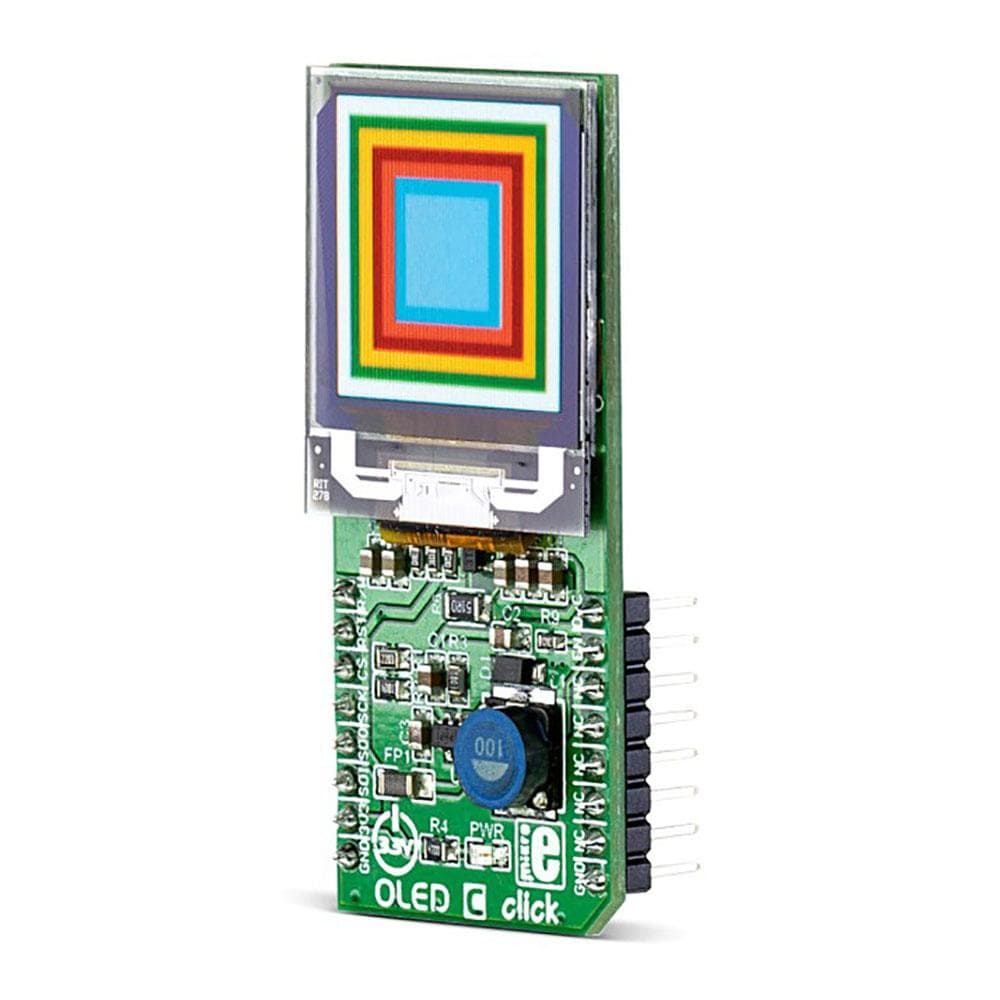
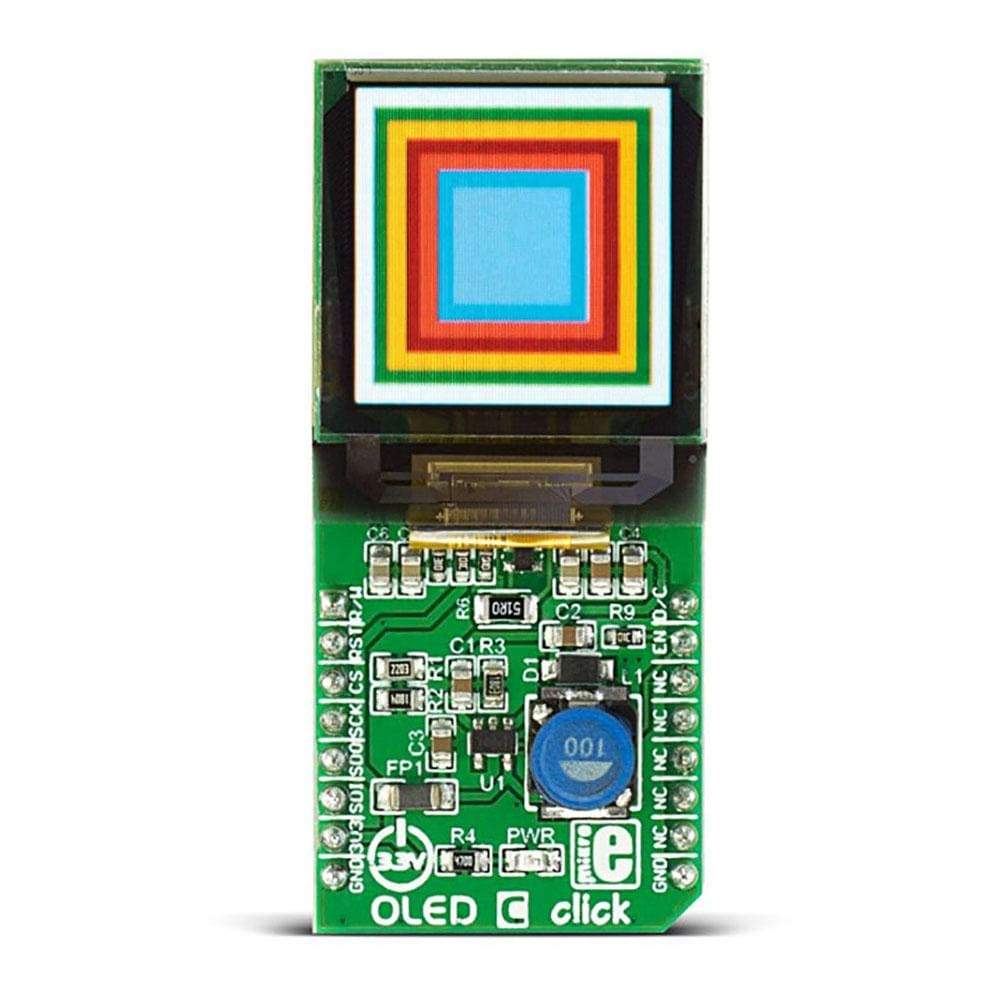
The OLED C Click Board™ is equipped with the 96x96 high-color OLED display. It can display up to 65K/262K different colors and shades on a compact 1.12 inch size display, based on the OLED technology. The OLED technology provides a very good brightness-to-contrast ratio, doesn’t require any backlight - since the pixel elements emit light on their own, better angle of viewing - compared to traditional TFT screens, better power consumption, better picture quality, better response times and more. The OLED technology is constantly being perfected and it is slowly taking over the existing liquid crystal technology (TFT).
Downloads
The OLED C Click Board™ is equipped with the 96x96 high-color OLED display. It can display up to 65K/262K different colors and shades on a compact size display, based on the OLED technology. The OLED technology provides a very good brightness-to-contrast ratio, doesn't require any backlight - since the pixel elements emit light on their own, better angle of viewing - compared to traditional TFT screens, better power consumption, better picture quality, better response times and more. The OLED technology is constantly being perfected and it is slowly taking over the existing liquid crystal technology (TFT).
The compact size of the display and the used OLED technology makes the OLED C Click Board™ a perfect solution for many applications which require the display of some information on the screen, in a form of a diagram, text or a pie chart. The Click board™ can be used to display images or any kind of graphics in 96x96 pixels resolution, with 65K/262K colors. It is a perfect solution to add display functionality to small development systems, such as the Clicker or Clicker 2 systems.
How Does The OLED C Click Board™ Work?
The OLED C Click Board™ features the PSP27801 OLED display, with the resolution of 96x96 pixels. The graphics driver used on this OLED display is the SSD1351, the display driver IC from Solomon Systech with embedded 128x128x18 bit SRAM display buffer. The SSD1351 driver is designed to work with the common cathode type OLED displays. It has both parallel (8080/6800) and serial interfaces for the communication.
The SSD1351 controller also has built-in functionalities like the vertical and horizontal scrolling, programmable frame rate, row and column remapping, color swapping, etc. It supports two color modes: 65K (6:5:6) and 262K (6:6:6) and up to 128x128 pixels. However, the used OLED display has 96x96 visible pixels.
To send command or data to the SSD1351 controller via the SPI interface, it is necessary to pull the D/C pin to a LOW or to a HIGH logic state. Sending data requires pulling this pin to a HIGH logic level while sending command requires pulling this pin to a LOW logic level. If the receiving byte is a type of data, it will be written directly to the Graphical Display Data memory (GDDRAM). If the receiving byte is a command, it will be decoded and written into the corresponding command register.
The GDDRAM on the device is sorted in 128x128 cells with 18 bits for each pixel. In the 262K color mode, three 8bit data words are interpreted as the pixel color value: the first word is the RED color data, the second word is GREEN color data and the third word is BLUE color data. Since every pixel can have a maximum of 18bits, each color is taking up 6 bits (6:6:6 color mode). The last 2 bits are disregarded.
When set to work in 65K color mode, only two 8bit words are required per pixel: the 5 MSB of the first word, is interpreted as the RED color data and the remaining 3 LSB are interpreted as the GREEN color data. The second 8bit word contains 3 more bits for the GREEN color data, while the remaining 5 LSB is the BLUE color data. This comprises the 5:6:5 pixel format.
The CS pin is a part of the SPI communication protocol and it is used to select the device and enable the communication on the serial bus. When this pin is pulled to a LOW logic level, the device expects data (or command, depending on the D/C pin state) to be clocked in from the MOSI pin of the mikroBUS™.
The R/W pin is used only for the parallel communication. When using serial communication (like it is a case for the OLED C click) this pin should be pulled to a LOW logic level.
The RST pin is used to reset the device when it is pulled to a LOW logic level. For the normal operation, this pin should stay at the HIGH logic level. When not asserted by the host MCU, this pin is set to a HIGH logic level by the pull-up resistor.
The EN pin is actually routed to the small, low power onboard step-up converter, used to provide voltage for the display. It uses the 3.3V rail of the mikroBUS™ and converts it to 15V on the output. EN pin enables or disables the step-up converter and consequently - the OLED screen itself. To enable this converter, the EN line should be pulled to a HIGH logic level. When not asserted, it is pulled to a LOW logic level by the pull-down resistor.
The OLED C Click Board™ comes with the library which contains functions which simplify working with the OLED C click while it is used with mikroC, mikroBASIC and mikroPASCAL compilers. These functions include a display of images, text with a selectable font, some basic shapes, and more. The library comes with the example application that demonstrates using these functions and it can be used as a reference for custom design.
COMPARISON TABLE
The table below shows the difference between the old version of the click, that is now obsolete, and the new one with the PSP27801 display.
| Product Version: | OLED_C_Click_v100 | OLED_C_Click_v101 |
|---|---|---|
| OLED part number: | MI9696CO_v1.1 | PSP27801 |
| Controller: | SEPS114A | SSD1351 |
| Display color: | 65,536 | 65,536/262,144 |
| Size/Resolution: | 96x96pix | 96x96pix |
| Module size: | 25.90 x 30.10 x 1.30 mm | 25.8 x 48.1 x 1.227mm (type) |
| Diagonal A/A size | 1.12 inch | 1.12 inch |
| Active area: | 19.852 x 19.852 mm | 20.135 x 20.14 mm |
| Dot pitch: | 0.207 x 0.207 | 0.07 x 0.21mm |
| Dot size: | 0.187 x 0.187 | 0.045 x 0.19mm |
| Interface: | 8-bit parallel,4-wire SPI | 8/16/18 bit parallel, 3-wire and 4-wire SPI |
SPECIFICATIONS
| Type | OLED |
| Applications | The OLED C Click Board™ can be used to display images or any kind of graphics in 96x96 pixels resolution, with 65K/262K colors. It is a perfect solution to add display functionality to small development systems, such as the Clicker or Clicker 2 systems. |
| On-board modules | PSP27801 OLED 1.12 Inch display, with the resolution of 96x96 pixels, and SSD1351 COF display driver IC from Solomon Systech |
| Key Features | Compact OLED color display with the resolution of 96x96 pixels, with inherently high contrast ratio, integrated SSD driver IC which provides 5:6:5 and 6:6:6 color formats, wide viewing angle and high-speed SPI communication with low pins count |
| Interface | SPI |
| Compatibility | mikroBUS |
| Click board size | L (57.15 x 25.4 mm) |
| Input Voltage | 3.3V |
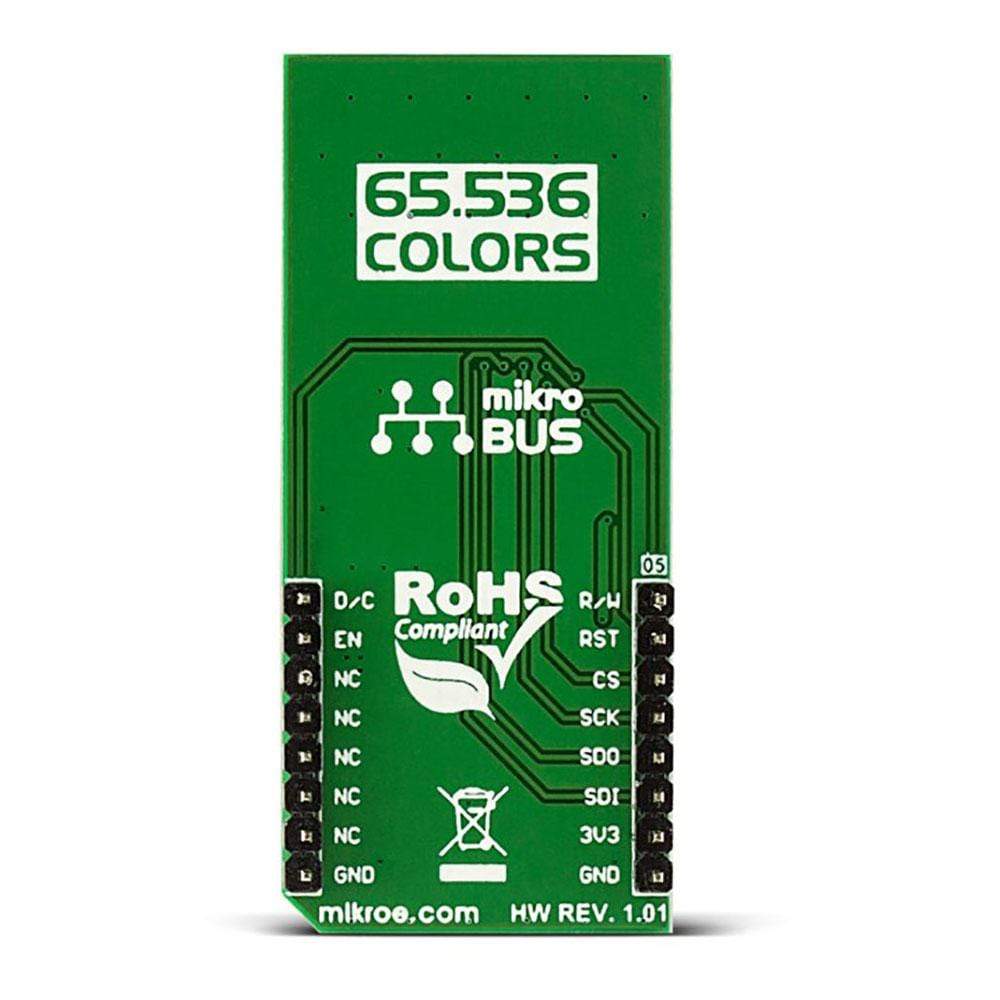
PINOUT DIAGRAM
This table shows how the pinout of the OLED C Click Board™ corresponds to the pinout on the mikroBUS™ socket (the latter shown in the two middle columns).
| Notes | Pin | Pin | Notes | ||||
|---|---|---|---|---|---|---|---|
| Read/Write | R/WC | 1 | AN | PWM | 16 | D/C | Data/Command |
| Reset | RST | 2 | RST | INT | 15 | EN | Enable |
| Chip select | CS | 3 | CS | TX | 14 | NC | |
| SPI clock | SCK | 4 | SCK | RX | 13 | NC | |
| Serial data output | SDO | 5 | MISO | SCL | 12 | NC | |
| Serial data input | SDI | 6 | MOSI | SDA | 11 | NC | |
| Power supply | +3.3V | 7 | 3.3V | 5V | 10 | NC | |
| Ground | GND | 8 | GND | GND | 9 | GND | Ground |
ONBOARD SETTINGS AND INDICATORS
| Label | Name | Default | Description |
|---|---|---|---|
| LD1 | PWR | Power indication LED |
| General Information | |
|---|---|
Part Number (SKU) |
MIKROE-1585
|
Manufacturer |
|
| Physical and Mechanical | |
Weight |
0.035 kg
|
| Other | |
EAN |
8606015075310
|
Frequently Asked Questions
Have a Question?
Be the first to ask a question about this.