Overview
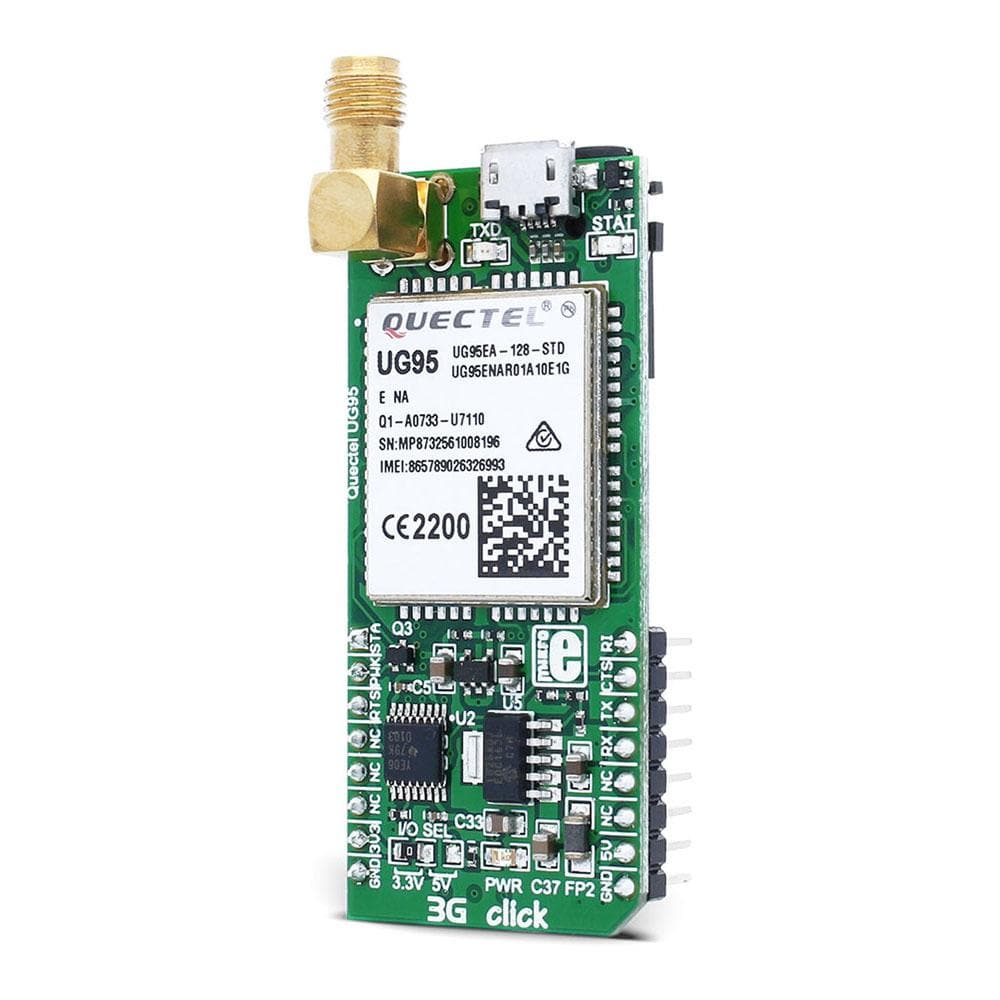
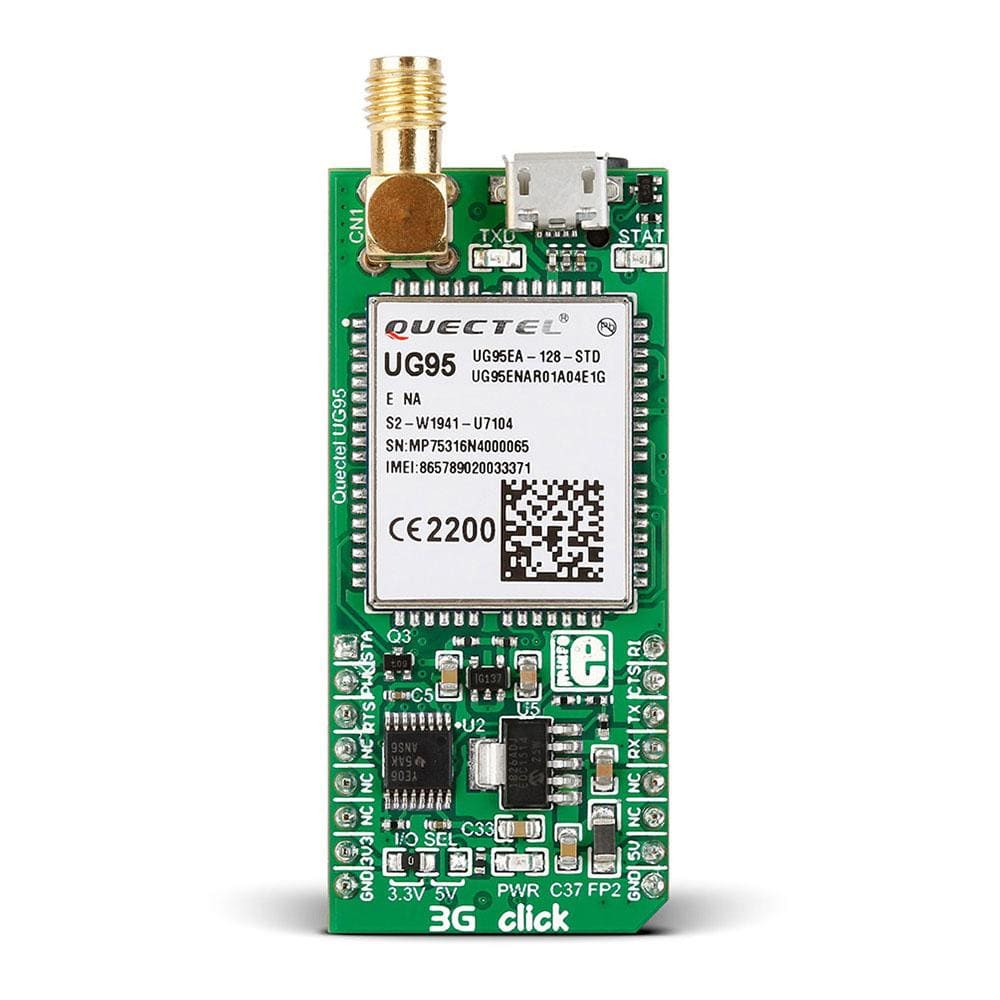
The 3G-EA Click Board™ is a versatile cellular network communication solution featuring the compact 3G UMTS/HSPA Quectel UG95 module. This module features a full set of cellular networking and communication options, such as the network indication, embedded TCP/UDP stack, HTTP/HTTPS stack, full GSM/GPRS/EDGE implementation, UMTS/HSDPA/HSUPA protocol implementation and more.
3G-EA Click Board™ features data rates of 7.2 Mb/s (downlink) and 5.76 Mb/s (uplink) in HSPA mode. on-board 16-bit audio CODEC IC adds high-quality voice communication capability.
Downloads
The 3G-EA Click Board™ is a versatile cellular network communication solution, featuring the compact 3G UMTS/HSPA Quectel UG95 module. This module features a full set of options for the cellular networking and communication, such as the network indication, embedded TCP/UDP stack, HTTP/HTTPS stack, full GSM/GPRS/EDGE implementation, UMTS/HSDPA/HSUPA protocol implementation and more. 3G-EA Click Board™ features data-rates of 7.2 Mb/s (downlink) and 5.76 Mb/s (uplink) in HSPA mode. Onboard 16bit audio CODEC IC adds high-quality voice communication capability.
3G-EA Click Board™ is qualified to work at European and Australian UTMS frequency bands. A wide range of Internet protocols and connectivity options, as well as the Quectel's simple AT command interface via the UART bus, make this Click Board™ perfectly suited for a wide range of M2M applications, such as mobile Internet terminals, automatic meter reading (AMR), remote monitoring automation and control (RMAC), surveillance and security, road pricing, asset tracking, fleet management, anti-theft systems, point of sales (PoS) terminals, and similar applications which rely on a cellular network connection.
How Does The 3G-EA Click Board™ Work?
As previously mentioned, 3G-EA Click Board™ is equipped with the compact dual-band 3G UMTS/HSPA Quectel UG95 module, from Quectel Wireless Solutions Company. This Click Board™ is compliant with the European and Australian UTMS frequency bands. For the American region, please visit the 3G-AA product page. A complete list of supported frequencies, along with other relevant info about the module itself can be found in the Quectel UG95 module datasheet. This device is the main component of the Click Board™ and it consists of a number of internal blocks or sections, such as antenna switching section, RF transceiver section, memory, power management, and most importantly - the cellular baseband processor. This section contains the logic necessary for managing the other sections and provides the interface to the host MCU. This interface consists of several lines used to report the device and the network status, SIM card interface lines, UART interface lines, USB interface lines, I2C bus lines, device control lines, and PCM bus lines. These lines are routed to the respective elements of the Click Board™.
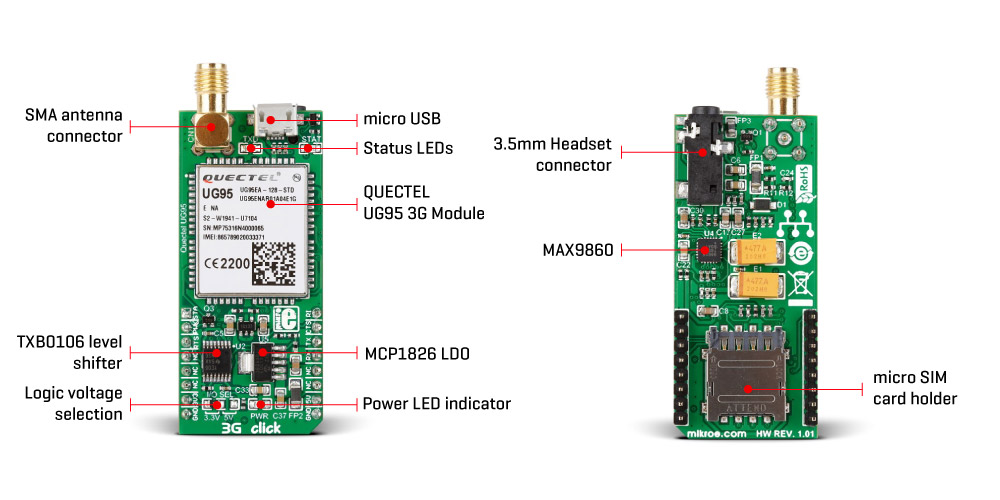
The Quectel UG95 module has to be powered by a clean and stable power supply. The voltage needed for the module to work properly is about 4V and it is derived from the 5V mikroBUS rail, through the MCP1826, a 1A low drop output (LDO) regulator from Microchip. Although the Quectel UG95 module is a low-power device, the cellular network modules, in general, are notorious for their high-power consumption when working in the active mode, so the 1A LDO had to be used.
Digital sections of the Quectel UG95 are internally supplied by 1.8V, so it is necessary to condition the communication bus lines which connect the host MCU with the module. For this reason, another small LDO is used, providing a needed reference voltage for one side of the TXB0106, a 6bit bidirectional level shifting and voltage translator with automatic direction sensing, from Texas Instruments. The reference voltage for the other side of the level shifter is taken from the onboard SMD jumper, labelled as I/O SEL. This jumper is used to select between 3.3V and 5V from the mikroBUS, depending on the used MCU type and its logic voltage level requirements.
UART interface supports baud rates of 300, 1200, 2400, 4800, 9600, 19200, 38400, 57600, 115200, 230400, 460800 and 921600bps, with the default setting to automatic baud rate detection, between 4800 and 115200. The UART interface can be used for data transmission, AT communication or firmware upgrade.
The UART bus of the Quectel UG95 module is connected to one side of the level shifter, while the other side (shifted) is connected to the respective mikroBUS UART pins. However, the Quectel UG95 module is designed as the traditional DCE device (Data Communication Equipment) offering the full UART pin count, including the hardware flow control pins (CTS, RTS). These pins are routed to the mikroBUS CS (RTS) and the INT pin (CTS) and can be used in the MCU software if hardware flow control is needed. The RI pin is the ringing indicator, and it is routed to the mikroBUS PWM pin.
The STAT pin is used to signalize the status of the device. This pin is routed both to the mikroBUS AN pin through the level shifter, and the yellow LED used to visually indicate the device status. The network status is indicated by the red TXD LED, located next to the STAT LED. The network status is indicated by the TXD LED, using the following pattern:
- Cyclically high for 200ms, low for 1800ms: network searching
- Cyclically high for 1800ms, low for 50ms: idle / data transfer
- Always high: voice / CSD call
The PWRKEY pin is routed to the mikroBUS RST pin, and it is used during the power-up sequence. A low pulse on this pin for at least 100ms will power up the device if the valid supply voltage is provided. The successful action will be indicated by the STAT LED and the STAT (AN) pin. It is recommended to safely turn off the module by issuing the AT+QPOWD command. This command will let the module log off from the network and allow the firmware to save important data, before completely disconnecting the power supply.
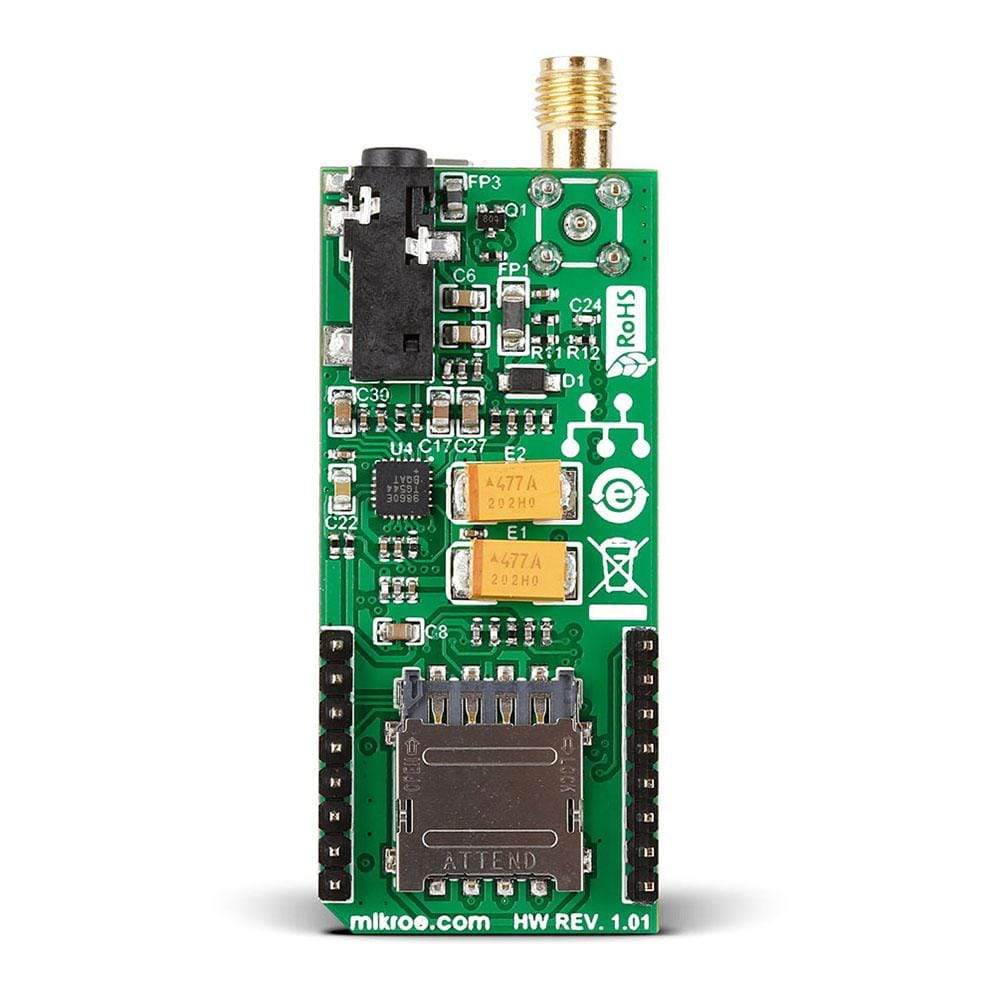
The Quectel UG95 offers the PCM interface, used for digital audio. The MAX9860, a 16bit mono audio voice CODEC IC from Maxim Integrated, provides the 3G-EA Click Board™ with the voice communication. The MAX9860 IC uses the PCM and I2C interfaces to communicate with the Quectel UG95 module. It is also powered with 1.8V from the LDO, so no level shifting is required in this case. This IC provides a clean and audible analog interface for connecting the headset, with one audio output channel and one microphone input channel. The headset can be connected via the onboard 3.5mm audio jack.
3G-EA Click Board™ is equipped with the micro USB connector. It allows the module to be powered and configured by a personal computer (PC). Quectel Wireless Solutions Company offers a software suite that can be used with the 3G-EA Click Board™.
The Micro SIM card holder on the back of the Click Board™ is used to install a micro SIM card. This device cannot be used without the valid SIM card, which allows connection to the cellular network. Both 1.8V and 3V SIM card types are supported.
If you are not familiar with cellular network standards and protocols and are not sure whether you need GSM or 3G or 4G, read our learn.mikroe.com article about 2G/3G/4G to get a better understanding.
SPECIFICATIONS
| Type | GSM/LTE,3G UMTS |
| Applications | Used for mobile Internet terminals, automatic meter reading (AMR), remote monitoring automation and control (RMAC), surveillance and security, road pricing, and similar M2M applications which rely on a cellular network connection. |
| On-board modules | 3G UMTS/HSPA Quectel UG95 module, from Quectel; MCP1826, a 1A low drop output (LDO) regulator from Microchip; TXB0106, a 6bit bidirectional level shifter from Texas Instruments |
| Key Features | Network indication, embedded TCP/UDP stack, HTTP/HTTPS stack, full GSM/GPRS/EDGE implementation, UMTS/HSDPA/HSUPA protocol implementation, audio CODEC and more |
| Interface | UART,USB |
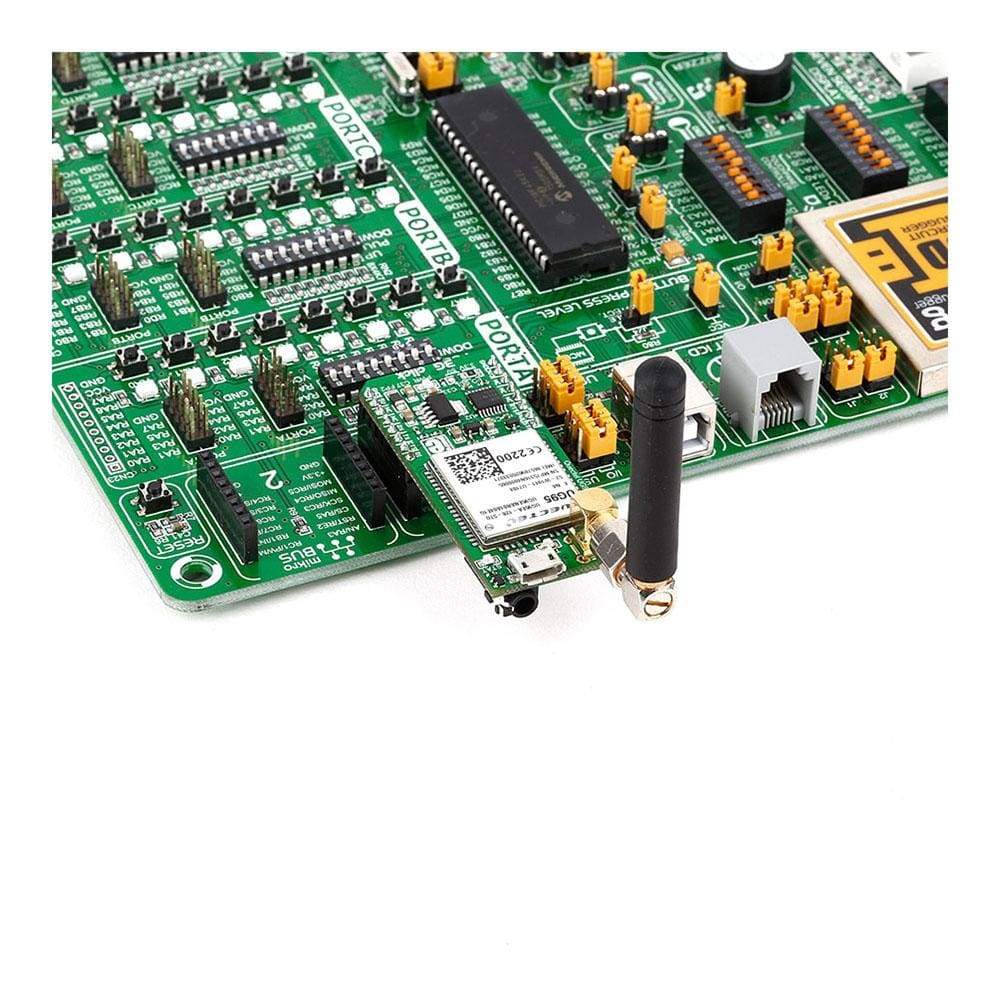
| Compatibility | mikroBUS |
| Click Board™ size | L (57.15 x 25.4 mm) |
| Input Voltage | 3.3V or 5V |
PINOUT DIAGRAM
This table shows how the pinout on 3G-EA Click Board™ corresponds to the pinout on the mikroBUS socket (the latter shown in the two middle columns).
| Notes | Pin |  |
Pin | Notes | |||
|---|---|---|---|---|---|---|---|
| Module status | STA | 1 | AN | PWM | 16 | RI | Ring indicator |
| Power-up module | PWK | 2 | RST | INT | 15 | CTS | UART Clear to Send |
| UART Ready to Send | RTS | 3 | CS | RX | 14 | TX | UART transmit |
| NC | 4 | SCK | TX | 13 | RX | UART receive | |
| NC | 5 | MISO | SCL | 12 | NC | ||
| NC | 6 | MOSI | SDA | 11 | NC | ||
| Power supply | +3.3V | 7 | 3.3V | 5V | 10 | +5V | Power supply |
| Ground | GND | 8 | GND | GND | 9 | GND | Ground |
ONBOARD SETTINGS AND INDICATORS
| Label | Name | Default | Description |
|---|---|---|---|
| LD1 | NET | - | Network status LED |
| LD2 | STAT | - | Module power status LED |
| JP1 | I/O SEL. | Left | Logic level voltage selection: left position 3V3, right position 5V |
| General Information | |
|---|---|
Part Number (SKU) |
MIKROE-2226
|
Manufacturer |
|
| Physical and Mechanical | |
Weight |
0.028 kg
|
| Other | |
Country of Origin |
|
HS Code Customs Tariff code
|
|
EAN |
8606015078205
|
Warranty |
|
Frequently Asked Questions
Have a Question?
Be the first to ask a question about this.

