Overview
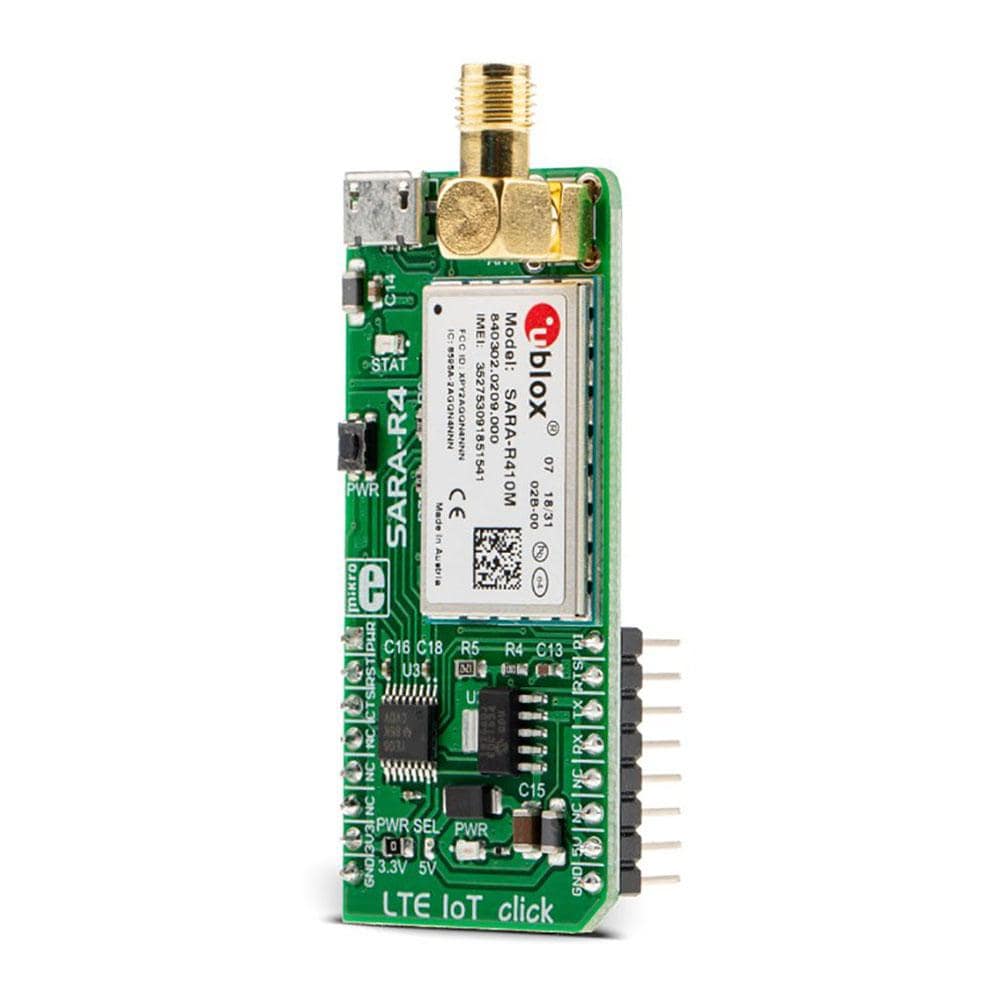
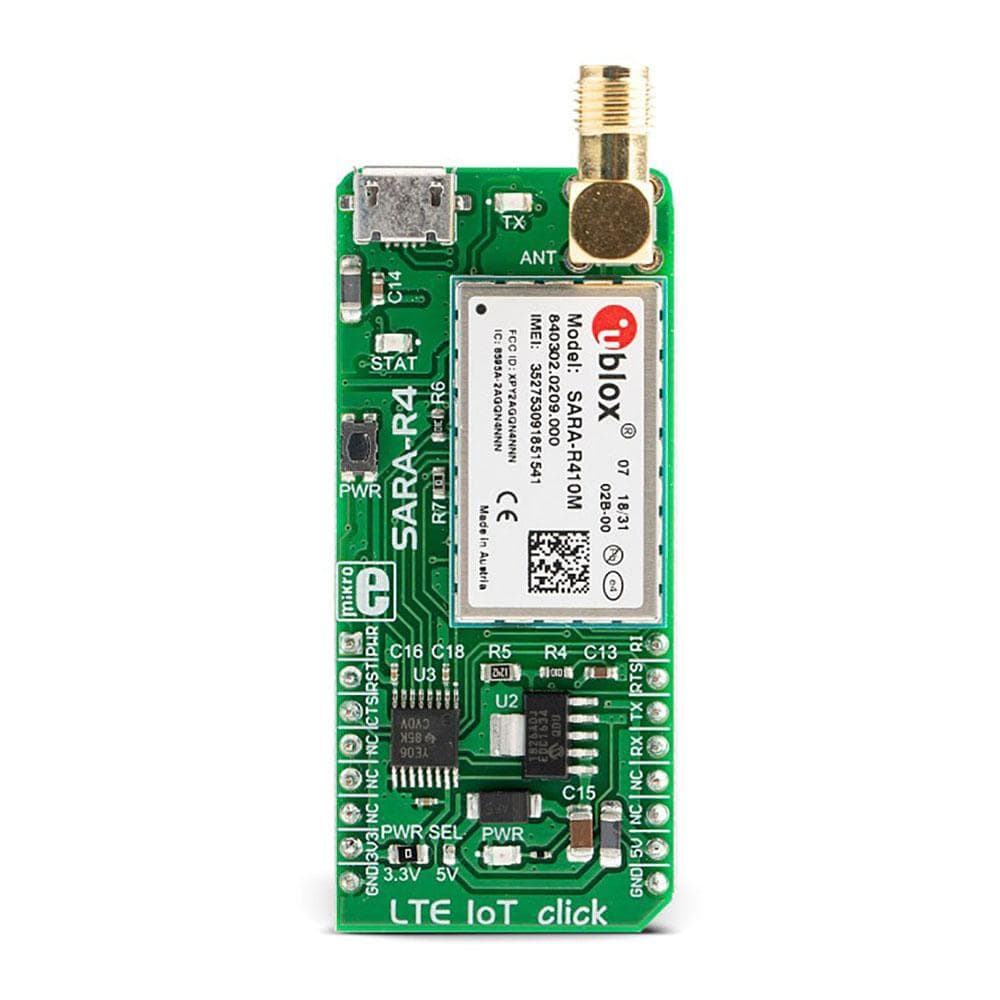
The LTE IoT Click Board™ is a compact add-on board that contains a complete and cost-efficient solution offering multi-band data transmissions for Low-Power Wide-Area solutions. This board features the SARA-R410M-02B, a cellular module that supports LTE CAT M1 and Narrowband 1 (NB1) technologies, developed with IoT applications in mind from u-Blox. Designed for worldwide operation with a rich set of Internet protocols, equipped with industry-standard interfaces (UART, USB…), Network and Status indicators, familiar AT commands set over the UART interface, micro USB connector for interfacing with software application from u-Blox, are just some of the features available on this Click Board™. Its many features make it suitable for use in a wide range of M2M applications, such as smart metering in various industries (agriculture, gas distribution, water distribution), product tracking, and more.
The LTE IoT Click is supported by a mikroSDK compliant library, which includes functions that simplify software development. This Click Board™ comes as a fully tested product, ready to be used on a system equipped with the mikroBUS™ socket.
Downloads
How Does The LTE IoT Click Board™ Work?
The LTE IoT Click Board™ is based on the SARA-R410M-02B, a configurable LTE Cat M1/NB1 multi-mode module with global support for IoT and M2M applications from u-Blox. This module consists of several internal blocks or sections, such as the RF and memory section, the power management section, and the cellular baseband processor with the peripheral interfaces. It supports UART and USB interfaces, alongside an interface for external SIM card/chip, an ultra-low power consumption, and cost-optimized solutions making it ideal for the development of LPWA IoT applications. It also provides an Extended Discontinuous Reception (e-DRX), which can extend battery life up to 10 years. Another benefit of SARA-R410M-02B is the hardware readiness for future support of voice functionality via VoLTE over Cat M1, which can be used for applications requiring a level of human interaction, as is the case for security applications such as alarm panels.
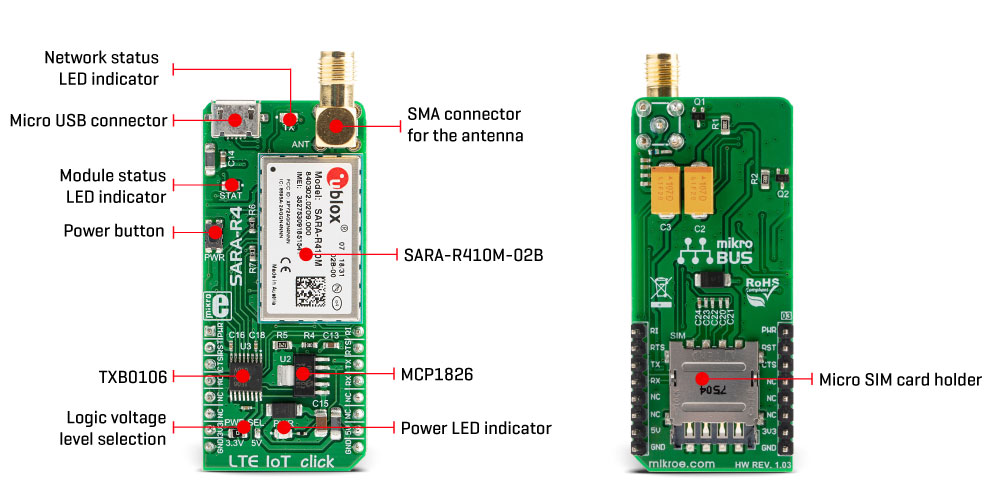
The power supply of the SARA-R410M-02B module is regulated to 3.8V by the MCP1826, a 1A low-drop output (LDO) regulator from Microchip. The digital interface supply output pin from the module is providing a needed reference voltage for one side of the TXB0106, a 6-bit bidirectional level shifting and voltage translator, from Texas Instruments. The main UART bus of the module is connected to one side of the TXB0106 level shifter, while the other side is connected to the respective mikroBUS™ UART pins. The reference voltage for the other side of the level shifter is taken from the onboard SMD jumper, labeled as PWR SEL used to select between 3.3V and 5V from the mikroBUS™, depending on the used MCU type and its logic voltage level requirements.
The SARA-R410M-02B module communicates with MCU using the UART interface with commonly used UART RX and TX pins including the hardware flow control pins UART CTS, RTS, RI (Clear to Send, Ready to Send, and Ring Indicator). It supports automatic baud rate detection, operates at 115200 bps by default configuration, and it is used for data transmission and exchanging AT communication commands with the host MCU. In addition to the default baud rates, the UART interface supports baud rates of 9600, 19200, 38400, and 57600. This interface can also act as a device and be connected to a USB host, such as the personal computer (PC), allowing the proprietary application from u-Blox called m-center to be used, offering a clean and comprehensive interface for accessing the main functionality of the module, setting up the configuration parameters, managing SMS messages, tracing the module activity, and more.
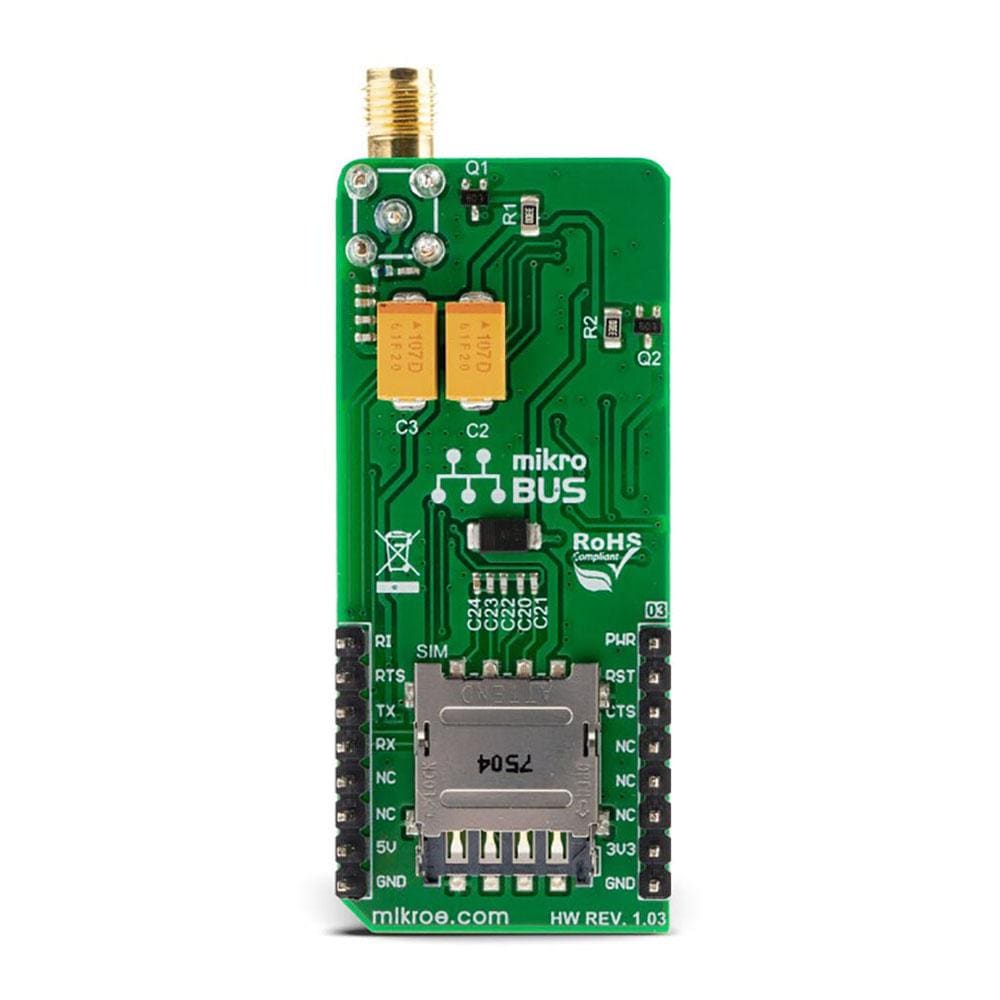
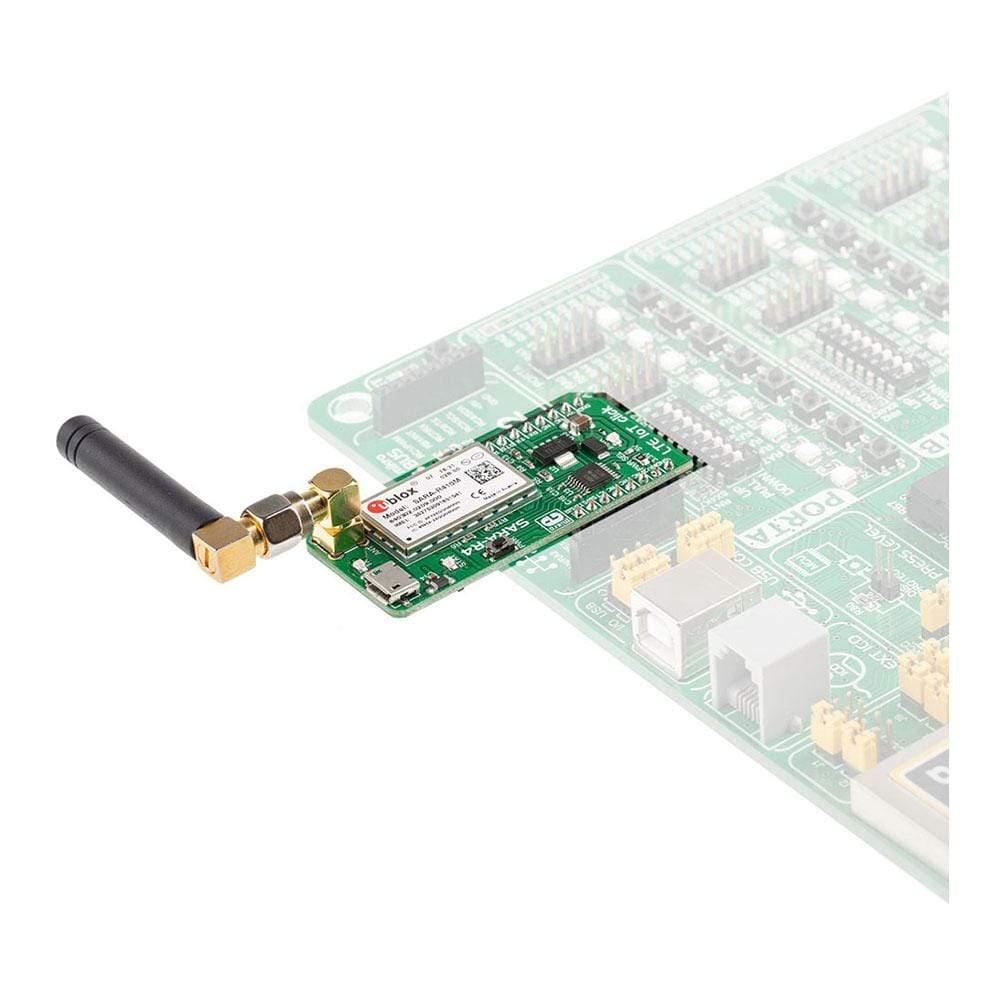
The LTE IoT Click Board™ possesses on itself the SMA antenna connector with an impedance of 50Ω and it can be used for connecting the appropriate antenna that MikroE has in its offer such as Rubber Antenna GSM/GPRS Right Angle. This antenna is an excellent choice for all GSM/GPRS applications and supports a various range of frequencies and bands. It has a Micro SIM card holder on the back of the Click board™ used to install a micro SIM card which allows connection to the cellular network with both 1.8V and 3V SIM card types supported.
The onboard active-low pushbutton labeled as PWR routed to the AN pin on the mikroBUS™ represents the Ignition (Power-On) button which successful action will be indicated by the STAT LED. If the device is already powered up, a LOW pulse with the duration of 1.5s on this pin will power the module down. It is also possible to power down the module by issuing the AT+CPWROFF command or with a Reset function routed to the RST pin on the mikroBUS™ which will cause an abrupt power down (forced power down) by sending an active low input on this pin with the duration of 10s.
The LTE IoT Click Board™ has two LED indicators: the yellow LED labeled as STAT used to visually indicate the Operational Status of the device, and a red LED labeled as TX used to indicate the Network Status. The network status is indicated using the following pattern:
General network signalization:
- Always low: No network coverage / Not registered on a network
For home network connection:
- Cyclically high for 50ms, low for 50ms, high for 50ms, low for 2s: registered to a 3G network
- Cyclically high for 100ms, low for 3s: registered to CAT Narrowband 1 (NB1) network
- Always high: data transmission in progress
For roaming network connection:
- Cyclically high for 50ms, low for 50ms, high for 50ms, low for 100ms: registered to a 3G network
- Cyclically high for 100ms, low for 100ms, high for 100ms, low for the 30s: registered to CAT Narrowband 1 (NB1) network
- Cyclically high for 800ms, low for 200ms: data transmission in progress
The LTE IoT Click Board™ is designed to be operated with both 3.3V and 5V logic voltage levels that can be selected via the PWR SEL jumper. A proper logic voltage level conversion is performed by appropriate voltage level shifters, while the LDOs are ensuring that the module is powered by recommended values. This allows for both 3.3V and 5V capable MCUs to use the UART communication lines properly.
SPECIFICATIONS
| Type | LTE IoT |
| Applications | Can be used for a smart metering, IoT networking, remote monitoring automation and control, and other IoT / M2M applications which rely on a cellular network connection, and more. |
| On-board modules | LTE IoT Click is based on the SARA-R410M-02B, a configurable LTE Cat M1/NB1 multi-mode module with global support for IoT and M2M applications from u-Blox. |
| Key Features | CAT NB and CAT M1 technologies support, aimed at M2M and IoT applications, software-based configuration of the operator profiles and LTE bands allows multiple regions coverage, USB connectivity, visual network and status indication, and more. |
| Interface | UART,USB |
| Compatibility | mikroBUS |
| Click board size | L (57.15 x 25.4 mm) |
| Input Voltage | 3.3V or 5V |
PINOUT DIAGRAM
This table shows how the pinout on LTE IoT click corresponds to the pinout on the mikroBUS™ socket (the latter shown in the two middle columns).
| Notes | Pin |  |
Pin | Notes | |||
|---|---|---|---|---|---|---|---|
| Power ON | PWR | 1 | AN | PWM | 16 | RI | Ring indicator |
| HW Reset / Power OFF | RST | 2 | RST | INT | 15 | RTS | UART Ready to Send |
| UART Clear to Send | CS | 3 | CS | RX | 14 | RX | UART RX |
| NC | 4 | SCK | TX | 13 | TX | UART TX | |
| NC | 5 | MISO | SCL | 12 | NC | ||
| NC | 6 | MOSI | SDA | 11 | NC | ||
| Power supply | 3.3V | 7 | 3.3V | 5V | 10 | +5V | Power supply |
| Ground | GND | 8 | GND | GND | 9 | GND | Ground |
ONBOARD SETTINGS AND INDICATORS
| Label | Name | Default | Description |
|---|---|---|---|
| LD1 | TX | - | Network status LED indicator, red |
| LD2 | STAT | - | Module Status LED Indicator |
| LD3 | PWR | - | Power LED Indicator |
| JP1 | PWR SEL | Left | Power Supply Voltage Selection 3V3/5V: Left position 3V3, Right position 5V |
| T1 | PWR | Left | Power button: Power ON - hold pressed for 150ms, Power OFF - hold pressed for 1.5s |
| CN2 | ANT | Left | Main SMA Antenna Connector |
| CN3 | USB | Left | Micro USB Connector Type AB |
| SIM | SIM | Left | SIM Card Holder |
LTE LOT CLICK ELECTRICAL SPECIFICATIONS
| Description | Min | Typ | Max | Unit |
|---|---|---|---|---|
| Supply Voltage | -0.5 | - | 5.2 | V |
| LTE FDD Band Range | 700 | - | 2100 | MHz |
| LTE Cat M1/NB1 Power Class | - | 23 | - | dBm |
| Operating Temperature Range | -40 | - | +85 | °C |
| General Information | |
|---|---|
Part Number (SKU) |
MIKROE-3072
|
Manufacturer |
|
| Physical and Mechanical | |
Weight |
0.031 kg
|
| Other | |
Country of Origin |
|
HS Code Customs Tariff code
|
|
EAN |
8606018713547
|
Warranty |
|
Frequently Asked Questions
Have a Question?
Be the first to ask a question about this.

